DisneySide @Home Celebration!

Standard

  Image

We hosted a DisneySide @Home Celebration….and we had a blast!!  Thank you so much to Disney Parks, Mom Select, HP, American Tourister and Ocean Spray for the wonderful party supplies, guest gifts and hostess goodies that were included in our box.  Disney Parks wants everyone to Show Their Disney Side this year and a select number of people were chose to do just that.  We were sent a box with great party supplies to get us started.


 Image ImageImage

We also added a few party supplies of our own.Image

  We chose to have a Disney Luau with our family and friends.  There were lots of yummy eats and treats, Disney Bingo (which came in our box), a Treasure Hunt for the little kids and lots of great Disney prizes.

ImageImage

We are so glad our friends and family joined us for our DisneySide Celebration.

 ImageImage ImageImageImage

Image

A special thank you to the kids that made the party so much fun!ImageImageImageImageImageImageImage

I like to thank all of the sponsors for my wonderful hostess gifts as well.

ImageImageImage

I will be using my measuring cups from ABC’s The Chew when I bake.  The Mickey cookie cutters are perfect for cookies, sandwiches or other Mickey shaped snacks and I will definitely be using my American Tourister luggage on our Disney vacation this summer!!  We can’t wait to get to Disney World and Show Our Disney Side!!!

Image

Please visit the DisneySide Celebration Facebook group at www.facebook.com/#!/groups/disneysidecelebrations.  Also visit the Disney Side website at www.disneysidecelebrations.com/.  Plan a party, invite your family and friends and show your DisneySide!

No Bake Boston Cream Pie Dessert

Standard

I like to give credit where credit is due when I post a recipe.  Unfortunately, I have looked at so many recipes on Facebook and Pinterest lately, that I can’t remember where I saw this one!   I jotted down the ingredients and instructions and totally forgot to write down who posted it.  I did want to let you know this is not my recipe.  It is, however,  simple and delicious!!

You will need:

1 box of Honey Graham Crackers

2 boxes of French Vanilla Instant Pudding

1 -9 0z. tub of Cool Whip

3 Cups of Whole Milk

1 Can of Chocolate Frosting

In a bowl ( I use my Kitchen Aid),  mix the 2 boxes of French Vanilla Instant Pudding with 3 cups of whole milk until it thickens.  Add the 9 oz. tub of Cool Whip and mix thoroughly.

In the bottom of  a 9×13 baking dish, put a layer of the Honey Graham Crackers.  Spread a layer of the pudding mixture on top of the graham crackers.  Keep alternating layers and make sure you end with a layer of graham crackers on top.  I had 3 layers of graham crackers and 2 layers of pudding when I did this one.

Spread the tub of chocolate frosting on the top layer of graham crackers and that is it!  We had to taste this as soon as it was finished.  The graham crackers are still crunchy at this point so it was a little difficult to eat with a spoon.  I would recommend leaving it in the fridge for several hours so the graham crackers have enough time to soften up.   We left ours in the fridge overnight and had some after lunch the next day.  It is absolutely yummy!!  I’m usually not one to eat Boston Cream Pie, but this dessert was so simple to make I had to give it a try.

This is what it looked like when we cut it while the graham crackers were still crunchy.  It cuts much easier (and neater!) after they have softened up.   If you’re looking for a simple dessert that will be a crowd pleaser, definitely give this one a try!


It’s Giveaway Time!!

Standard

In honor of my Facebook page reaching over 600 fans, I’m having a giveaway!  One lucky reader will receive 3 awesome cookbooks that contain some really yummy recipes.  Here are a few pictures so you can see for yourself.


Soon you’ll be making delicious cakes and pies for dessert.  The Fix It and Forget It series is one of my favorites.  This cookbook has over 550 recipes in it!  The giveaway will run from today, Jan. 21, 2012 til next Sunday, January 29, 2012.  There are several ways to enter.  The more you choose to do, the better your chances of winning!  Here they are:


1. You must “Like” my Facebook page, http://www.facebook.com/#!/pages/Ihearditsyummy/216206971770433 and then leave me a comment here on this blog letting me know you did so.  If you already are a fan of the page, please leave a comment letting me know that, also.

 2. Go to our Facebook Group, http://www.facebook.com/#!/groups/ihearditsyummy/, and join us.  Then come back here and leave a comment letting me know you asked to join.

3. Leave me a comment here and just say something nice….something nice about the blog, what you like about the giveaway, tell me what your favorite this to cook is….whatever you’d like.

4. Subscribe to my blog!!

Next Sunday evening, January 29, 2012, I will have random.org choose one winner for all 3 cookbooks and will announce it on my Facebook page so keep checking there to see if you’ve won.  Good Luck Everyone!!

Apple Brown Betty in the crock pot!

Standard

When I buy fruit, I always buy it with good intentions.  I intend on eating it instead of some other less healthy snack, but it always seems to just sit there.   I’ve had some Granny Smith apples sitting on the counter just staring at me and this time, instead of just tossing them out, I decided to look for a recipe to use them in.   The first site I went to was www.thecountrycook.net as Brandie always has yummy things on her blog.  I LOVE her potato salad, hamburger steak and apple danish recipes, they are three of my favorites.  I typed “apple” in her search bar and found this blog entry, http://www.thecountrycook.net/2011/09/apple-brown-betty.html.  I am ashamed to say I was so excited to read the recipe that I skimmed thru the blog post rather quickly and didn’t notice that the recipe was actually one from the Big Book of Homecooking by Gooseberry Patch.  Now, I do not have that cookbook and have never read it so I went by the recipe Brandie had posted on her blog.  I just need to mention all of that here so I can cover all of my bases and give credit where credit is due for the recipe.  I did, however, make a few changes to how everything was put together, added caramel to the recipe and cooked it in a crock pot instead of the oven.   Here we go:

Ingredients:
8 slices white bread
1/2 cup unsalted butter, melted
1 teaspoon Cinnamon
6 Granny Smith apples, peeled, cored & sliced
2/3 cup Light Brown Sugar, packed
2 tablespoons Lemon Juice
1 teaspoon Vanilla Extract
1 teaspoon Nutmeg

24 pieces of caramel candy


Cube all 8 pieces of bread into 1 inch pieces.  Place on a cookie sheet in a 400 degree oven until brown.  This took about 11-12 minutes in my oven. 


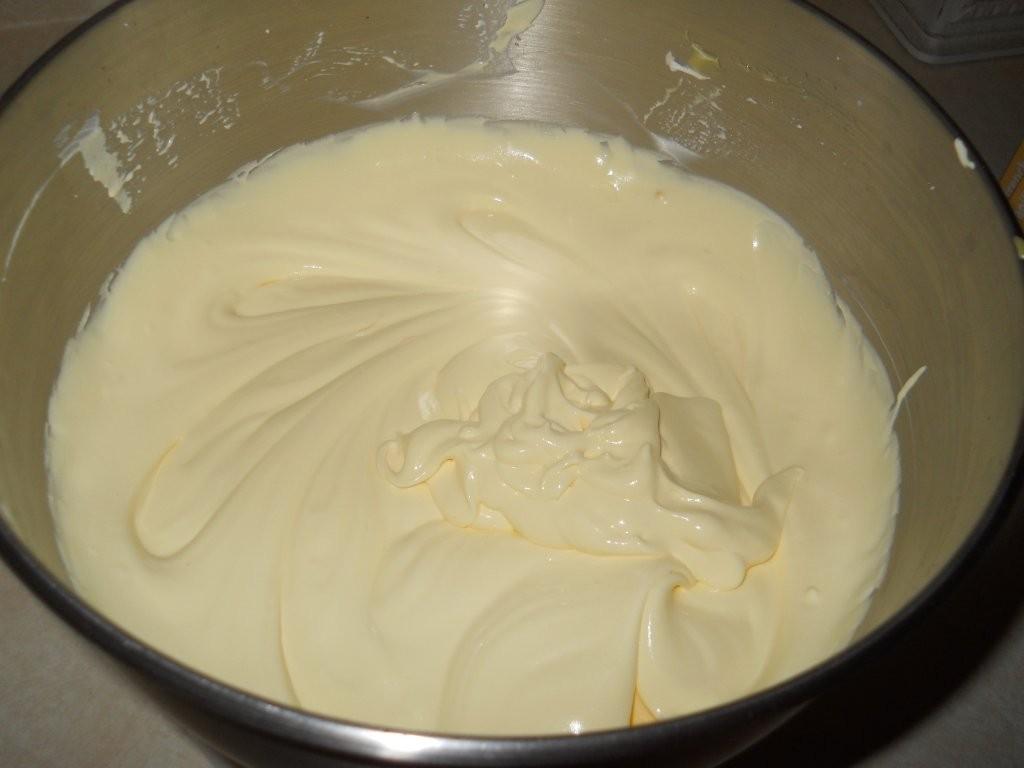
Peel, core and slice apples.  I tried not to slice my apples too thinly as I wanted them to be good-sized chunks.  Put apple slices in a bowl and add all remaining ingredients EXCEPT for the caramel.  Stir well and let sit for about 5 minutes. 

You probably should spray the inside of your crock pot with a non-stick cooking spray, but I forgot to do this. 😉  Put a layer of the bread crumbs at the bottom of the crock pot. 

Then put a layer of the apple mixture on top of that.  Unwrap your caramel candy and put about 8 pieces on top of the apples.  I only used about 6 pieces until I reached the top layer, but it could have used a little more, in my opinion.  You definitely could add more caramel if you’d like.  I think you might even be able to add caramel sauce here if you don’t have the candy on hand. 

I was able to get 3 layers of this in the crock pot and it pretty much reached the top.  I don’t remember how many quarts this one is, it is on the smaller side as far as crock pots go.  I put the lid on and cooked it on high for 2 hours and then turned it to low for 1 hour.  It does cook down some so keep that in mind.


This is one of the yummiest apple desserts I have ever eaten and so simple to make!  It would have been great with some vanilla ice cream, but I didn’t have any in the freezer.  I will have to remember that for next time.  Thank you so much Brandie and Gooseberry Patch!

Enjoy and thanks for reading.


Christmas Goodies

Standard

Hello, everyone!  It has been a while since I’ve written anything here.  Hope everyone is doing well.  I have wanted to put some goodies together for friends at Christmas and finally decided to do it this year.  I asked my sister, Jenny, if she wanted to do this with me, as I thought they would make good gifts for her to give to her friends and her children’s teachers as well.   We had fun doing these and I thought I would share the results with you! 

I had a friend that came to my rescue with recipes for Hot Cocoa, Buckeyes and Nutter Butter Santas.  Thank you, Kara!   The Nutter Butter Santas were fun and easy to make.  I think they turned out pretty cute!

I found the perfect little tubs to put the Hot Cocoa in.  We added crushed peppermints to the cocoa and put a candy cane in each tub, too.  Chocolate spoons are always a great way to add even more chocolatey flavor!  I liked making these, as well.  We added green swirls to some and others has Cinnamon Sprinkles on them.  I bet those will taste pretty good in a nice hot cup of cocoa.  


Next, we baked Chocolate Chip Cookies and Butter Sugar Cookies and put them in the cutest  little boxes.  The boxes came with cute stickers to hold the flaps down on them, those were a great idea!  You can really find some wonderful packaging for your baked goods.  I think I’m going to go shopping after Christmas and see if I can find these items when they are marked down.  Then I will have plenty for next year!


I totally forgot to take pictures of the Buckeyes and the fudge.  Those were two of the yummiest items to me.  I did take pictures of the bags we put them in.  I love these Santa’s and Snowmen!


  Special thanks to my niece, Brooke, for her help with these yesterday!  I hope all of the teachers that receive these enjoy the goodies that are in them.  We had a lot of fun making them for you!  Please forgive the shameless plug for my blog that my sister and I added to your bag…LOL!   If you read this, maybe you will leave me a comment and let me know how everything tasted.  It would be greatly appreciated.  You may even see your name in one of the photos, too! 

I hope everyone out there has a safe and wonderful holiday season.  I will be thinking of all of you when we are spending Christmas at Disney World and hopefully getting some new material for this blog! 

Merry Christmas, Happy New Year and Thank You for reading!

Lisa


Pumpkin Cupcakes with Pumpkin Buttercream Frosting

Standard

These pumpkin cupcakes are so yummy and really moist.  There are just a few ingredients in this recipe and there are no eggs or oil in them.  The pumpkin buttercream frosting is delicous.  I could eat it by the spoonful!   Here are the recipes if you’d like to try a nice Halloween treat.

Pumpkin Cupcakes

1 Box Duncan Hines White Cake Mix

1 Cup Canned Pumpkin

2 Tsp. Pumpkin Pie Spice

1 Cup Applesauce

Preheat oven to 350 degrees. Pour white cake mix into a bowl. Add canned pumpkin, pumpkin pie spice and applesauce. Mix on medium speed for 2 minutes. Fill cupcake liners 3/4 of the way full with mix. If you aren’t using cupcake liners, make sure you spray your cupcake pan with a non-stick baking spray. Bake for 35-40 minutes, until a toothpick inserted in the middle of the cupcake comes out clean. Let cool thoroughly before adding frosting.   These are delicious enough to eat without  any frosting.  Enjoy!


Pumpkin Buttercream Frosting

1/3 Cup Solid Vegetable Shortening
1/3 Cup Butter
1/2 Cup Canned Pumpkin
… 1 Tsp. Pure Vanilla Extract
2 Tsp. Pumpkin Pie Spice
4 Cups Confectioner’s Sugar

Cream shortening and butter with mixer. Add canned pumpkin, pumpkin pie spice and vanilla. Add sugar, one cup at a time, beating well on medium speed. Scrape sides and bottom of bowl each time before adding more sugar. Beat on medium speed until fluffy. I cut back the canned pumpkin to 1/2 cup in this recipe. I used 1 cup in mine and it was way too runny. If  it needs to thicken up a bit you could add more sugar to it. This frosting is really good if you need a pumpkin fix!

Thanks for reading!

Holiday Wish List…..what do you want from Santa this year?

Standard


It’s that time of year again….well, for me anyway.  I know it is a bit early for some of you to start thinking about Christmas.  I do understand wanting to give Halloween and Thanksgiving equal attention before we move right on to Santa Claus sliding down the chimney.   Even though I love trick-or-treaters at the door and a huge turkey on my table, I tend to gravitate towards Christmas as soon as possible.  It is my favorite holiday, after all. 

Maybe part of my love for it is because I get to make lists.  It seems like I am constantly making a list for one thing or another and there are so many lists to make when it comes to the holidays!  Who to buy for, what to buy them, what to bake and a grocery list for all of that.  I think I love all of the prep work just as much as the holiday itself.  It’s kind of like when you’re planning a vacation.  You make a list of what to pack so you don’t forget anything, things you want to do when you get there, etc.  Speaking of vacations, do you stay home for the holidays or do you go visit family or friends?  Is this your time of year to just take a vacation to relax and not get caught up in all the holiday madness?

Can you guess where I want to be this year at Christmas?  That is the plan, anyway.  The reservations have been made, the deposits have been paid and the Christmas shopping has begun!  I am glad the kids are asking for things small in size this year as it will make traveling with these gifts easier.  I have a few things I want to buy them once we get there, but they are all on the small side, too.  Besides, our tree will be tabletop size this year as we will be in a resort.  That should make the presents look bigger, right? 

I know it will be total madness there, but I intend to ignore the negative parts of it as much as possible.  I want to see all the decorations, sample the holiday treats and just enjoy the time there with my family.  The fact that Santa will visit and leave us presents will just be a plus!  Maybe, if his reindeer are lucky, Tinkerbell will sprinkle him with pixie dust and he can fly from room to room delivering goodies and let Rudolph and the boys have a nap before the rest of his trip.  Oh wait, there have to be happy thoughts involved…I wonder what Santa’s happy thoughts are?  For that matter, what are your happy thoughts?  What do you want Santa to leave under your tree this year?  It’s never too early to start making out that list, you know! 

 Here are some things I’m going to have on mine:

Cookie Cutters

Cook Books

Cookie Sheets

Anything with cupcakes on it

Pot Holders

Kitchen Towels

Flavored Coffee

Different shaped cake pans

Oh, and PEACE ON EARTH!

Just about anything to do with cooking or baking would do.  Let me know what you are putting on your list this year.  It might give me a good idea for a gift for someone else…or remind me of something I’ve forgotten to put on mine. 😉


The Liebster Blog Award

Standard

I am so grateful to have been given another blog award by a fellow blogger.  This one is called the Liebster Blog Award.  In German, Liebster means Beloved, Dear, Dearest and it is so very special to me.  Thank so much to Nel from The PaperCup Kitchen.  You are so sweet to extend this award to me and my blog.  I am very thankful for your support and to everyone else reading!

In return, I am passing along this award to 5 other pages that I have enjoyed reading lately. 

The Hungry Mommy

Blog of a Peri-Menopausal Woman……. When I Remember

 The Dash Between

Kesha’s Kitchen Kreations

Love.Peace.Happiness.Cooking

It was so hard to choose just 5, but I have enjoyed reading these wonderful blogs.


Here are the rules that come with this
award:
 
1.) Show your thanks to the blogger that gave you the
award by linking back to them.
2.) Reveal your top 5 picks by leaving a comment on their
blog.
3.) Post the award on your blog.
4.) Enjoy the love of some of the most supportive people
on the internet!


Thank you again, Dear Nel! 

Pumpkin Whoopie Pies from Williams Sonoma

Standard

Not too long ago, I tried my first Whoopie Pie.  They were chocolate pies with a peanut butter cream in the middle and they were really good.  I’ve been wanting to try to make some ever since.  A shopping trip to Wilmington led me to Williams Sonoma.  When I walked in the store,  the smell of freshly baked pumpkin bread hit me.  It always smells so good in their store, no doubt this is how they get people in a cooking mood and a shopping mood, too.  I spied the Pumpkin Whoopie Pie mix and the pans to make them in and had to have one of each.  Any excuse to add to my collection of baking pans! 

Seeing as how all I had to do was empty a pouch into my Kitchen-Aid mixer, along with a few other ingredients, it seemed like it would be pretty simple, and for the most part, it was.  Have I ever mentioned how much I love my Kitchen-Aid mixer?  I have no idea what I did before I got one.  It is absolutely my favorite thing in my kitchen.  You know, some attachments for Christmas would be a wonderful gift.  Could you all pass that along to Santa?  Maybe I can leave him Whoopie Pies instead of cookies this year. 🙂 

Everything went in to the mixer with  no problem.  I sprayed the Whoopie Pie pan with non-stick cooking spray like the directions called for.  The box said to put 2 TBS of mix into each well.  I can tell you, either I don’t know how to measure out 2 TBS or this was way too much to put in them.  The mix was VERY thick so I may have erred when measuring this out.  Yes, I have to tell you the bad right along with the good, no matter how much I don’t want to.   After all the wells had been filled, I had no mix left.  This is the part where it would have helped if I had read the ENTIRE set of instructions before I just jumped in.  I needed the batter to fill the pan twice and here I had only filled it once!   The pie pan came with a recipe for original Whoopie Pies and that one calls for 1 1/2 TBS of mix in each well so I’m thinking maybe it wasn’t entirely my fault.  Next time, I think I’ll just try 1 TBS of mix in each well.  Gotta love trial and error.  

These were supposed to cook for 10 minutes, but seeing as how they were twice as full as what the directions called for, I let them cook about 15 minutes.  The lightbulb came on here and I figured I could just cut them in half!  Who would know?  I’d still have tops and bottoms and cream in the middle!

You probably can’t tell much by this picture, but my tops and my bottoms were going to be different sizes.  I was going to have to make lop-sided whoopie pies folks!  These were more muffin shaped than whoopie pie shaped.  Then that light bulb came on again…I could cut these in half, length wise and use two tops for half of them and two bottoms for the other half.  Am I a genius, or what?  Don’t answer that!  It was a pretty good cover up in my mind!

You can see how they turned out here.  I don’t think they look too bad and they tasted delicious!  See my new Snowman plate I got during my shopping trip?  It’s almost that time again and I can’t wait!!  Please, don’t forget to tell Santa about those attachments for my Kitchen-Aid!  As always, thanks for reading!!


Baron Bars

Standard

Baron Bars are a yummy snack when you need a chocolate fix.  They are very simple to make and require very few ingredients.  The hardest thing about making them is having the patience to wait until they have hardened long enough in the refrigerator. 😉  Trust me, at my son’s insistence last night, I tried speeding them up by placing them in the freezer.  After listening to him ask me every 10 minutes, “Are they done yet?”, I decided to take them out.  They were nice and hard on the top, but sticky on the bottom.  This lot turned out chewier than usual because I rushed them, however, they tasted as good as always.  For this recipe you will need:

1 1/2 sticks butter (3/4 cup)

1 cup light brown sugar

35-40 Saltine crackers

1 bag of semi-sweet chocolate chips


Preheat oven to 350 degrees. Line a large cookie sheet with aluminum foil.  Spread butter on the entire piece of foil.  Make sure you cover the foil good so the crackers will not stick to it.  Arrange Saltine crackers, salty side up, on the buttered foil.  Put as many as will fit without overlapping them.


In a medium-sized sauce pan, combine butter and brown sugar and bring to a boil.  Boil for one minute, stirring constantly.  Pour mixture over all of the Saltine crackers.  Spread evenly with a butter knife and make sure crackers are thoroughly covered.  Place cookie sheet in oven and bake for 8 minutes.


Remove cookie sheet from oven and pour chocolate chips over the crackers.  Spread chocolate evenly with a butter knife.  The chocolate chips will melt quickly and can be spread like frosting. 


Refrigerate cookie sheet for several hours until completely cool and chocolate is hard to the touch.  Break the Baron Bars into pieces as you peel it off of the foil.  I store mine in an airtight container or Ziploc bag in the refrigerator so the chocolate doesn’t melt.  The saltly, chocolately, sugary mix is YUMMY! 

Enjoy!